

Crispy Japanese Katsu Bowls | Homemade Tonkatsu Sauce in 30 Min!
Introduction
There’s something deeply satisfying about a perfectly crispy Japanese Katsu Bowl — golden-breaded pork or chicken cutlets, nestled on a bed of fluffy rice and drizzled with sweet, tangy, umami-packed homemade Tonkatsu sauce. It’s a dish that’s both comforting and crisp, hearty yet refined.
Katsu (short for katsuretsu, meaning “cutlet”) is a staple of Japanese cuisine, beloved for its crunchy panko coating and juicy interior. Traditionally served with shredded cabbage and steamed rice, it’s the kind of meal that feels like a restaurant indulgence — yet it’s surprisingly simple to make at home in under 30 minutes.
These Katsu Bowls are ideal for busy weeknights, meal prep, or casual entertaining. With a quick pan-fry and a pantry-friendly tonkatsu sauce, you’ll be enjoying crispy, savory bites in no time.
Ingredients Overview
Let’s break down what goes into making a stellar Katsu Bowl and why each ingredient matters:
Meat: Pork or Chicken Cutlets
- Pork loin or chicken breast are the classic choices. Both cook quickly and remain juicy when pounded to an even thickness.
- Slice into 1/2-inch thick pieces, then gently pound to about 1/4-inch for even cooking.
Alternative: Try tofu or eggplant slices for a vegetarian version — both get delightfully crisp when breaded.
Panko Breadcrumbs
- Japanese panko is lighter and airier than traditional breadcrumbs, yielding that signature crispiness.
- Toasted panko gives an extra layer of crunch and golden color even before frying.
Flour & Eggs
- Dredging in flour, egg, then panko ensures the coating sticks and forms an ultra-crisp shell.
- Season the flour lightly with salt and pepper for built-in flavor.
Oil for Frying
- Use a neutral, high-heat oil like vegetable, canola, or peanut oil.
- You’ll only need about 1/4–1/2 inch of oil for shallow frying — no need to deep-fry.
Rice
- Steamed Japanese short-grain rice is traditional, but jasmine or medium-grain white rice work well too.
- For a low-carb twist, try cauliflower rice or shredded cabbage as a base.
Tonkatsu Sauce (Homemade)
Forget the bottled stuff — making it from scratch takes minutes and tastes fresher. The sauce is a blend of:
- Ketchup – sweet and tangy base
- Worcestershire sauce – deep umami
- Soy sauce – saltiness
- Sugar – balances acidity
- Mirin or rice vinegar – optional for brightness
- Garlic & ginger – optional for depth
Garnishes
- Thinly sliced green onions
- Shredded cabbage or carrots
- Toasted sesame seeds
- Furikake or pickled ginger for an authentic finish
Step-by-Step Instructions
1. Prepare the Meat
- Place pork or chicken between two sheets of plastic wrap and pound to 1/4-inch thick.
- Season both sides with salt and pepper.
Pro Tip: Even thickness ensures crispiness without overcooking.
2. Dredge and Bread
Set up a 3-step dredging station:
- Plate of flour
- Bowl of beaten eggs
- Plate of panko breadcrumbs
Dip each cutlet into flour (shake off excess), then egg, then press firmly into panko to coat.
Let sit on a wire rack for 5–10 minutes to help the coating set.
3. Fry to Crispy Perfection
- Heat 1/4–1/2 inch of oil in a large skillet over medium heat.
- Fry cutlets for 2–3 minutes per side until golden brown and cooked through.
- Transfer to a paper towel-lined plate or wire rack.
Safety Tip: Don’t overcrowd the pan — work in batches if needed.
4. Make the Homemade Tonkatsu Sauce
In a small saucepan or bowl, whisk together:
- 1/4 cup ketchup
- 2 tablespoons Worcestershire sauce
- 1 tablespoon soy sauce
- 1 tablespoon sugar
- Optional: 1 teaspoon mirin or rice vinegar
- Optional: pinch of garlic powder or fresh grated ginger
Simmer on low heat for 2–3 minutes or stir well in a bowl until smooth.
Taste and adjust balance as needed — it should be tangy, sweet, and rich.
5. Assemble the Bowls
- Scoop steamed rice into bowls.
- Top with sliced katsu cutlet.
- Drizzle generously with warm tonkatsu sauce.
- Add shredded cabbage, green onions, sesame seeds, or any of your favorite toppings.
Serve hot with miso soup or a side of pickled vegetables for a full meal experience.
Tips, Variations & Substitutions
- Oven-Baked Option: Bake breaded cutlets at 425°F (220°C) for 18–20 minutes, flipping halfway.
- Air Fryer Friendly: Spray with oil and air fry at 390°F for 12–15 minutes for a lighter version.
- Add a Fried Egg: Top your bowl with a soft egg for a rich, runny addition.
- Spicy Twist: Mix a bit of sriracha or hot mustard into the tonkatsu sauce.
- Vegetarian Swap: Bread and fry slices of tofu, portobello mushrooms, or zucchini.
Serving Ideas & Occasions
Katsu Bowls are ideal for:
- Weeknight Dinners: Fast and satisfying.
- Bento Boxes or Meal Prep: Keeps well and reheats beautifully.
- Family-Friendly Meals: Kids love the crispy cutlets and sweet sauce.
- Weekend Lunches: A restaurant-style treat at home.
Pair with miso soup, edamame, or seaweed salad for a well-rounded Japanese-inspired spread.
Nutritional & Health Notes
- Protein: Chicken or pork cutlets offer lean protein to keep you full.
- Carbs: Rice provides energy — swap for brown rice or cauliflower rice for lower-carb.
- Fat: Shallow frying adds some fat, but air frying or baking can reduce it.
- Sodium: Reduce salt by using low-sodium soy sauce and keeping sauce portions modest.
Add extra veggies like cabbage, carrots, or cucumbers for fiber and vitamins.
FAQs
Q1: Can I make this gluten-free?
Yes — use gluten-free panko, tamari instead of soy sauce, and gluten-free Worcestershire sauce.
Q2: What’s the difference between tonkatsu and chicken katsu?
Tonkatsu uses pork (typically loin), while chicken katsu is made with boneless chicken breast or thigh. The method and sauce are the same.
Q3: Can I make tonkatsu sauce in advance?
Definitely. It keeps in the fridge for up to a week in an airtight container. Reheat gently before serving.
Q4: What’s the best cut of pork for katsu?
Boneless pork loin or center-cut chops are ideal. Trim excess fat and pound to even thickness for the best results.
Q5: Can I freeze katsu?
Yes — freeze breaded (uncooked) cutlets or already fried ones. Reheat in the oven or air fryer for crispy texture.
Q6: What if I don’t have panko?
Use crushed cornflakes or regular breadcrumbs, though the texture won’t be as light and crispy. Toasting breadcrumbs in a dry pan before breading can help.
Q7: Can I use beef or seafood?
Yes! Try thin slices of beef steak for a beef katsu variation or large shrimp for a seafood twist. Adjust cooking time accordingly.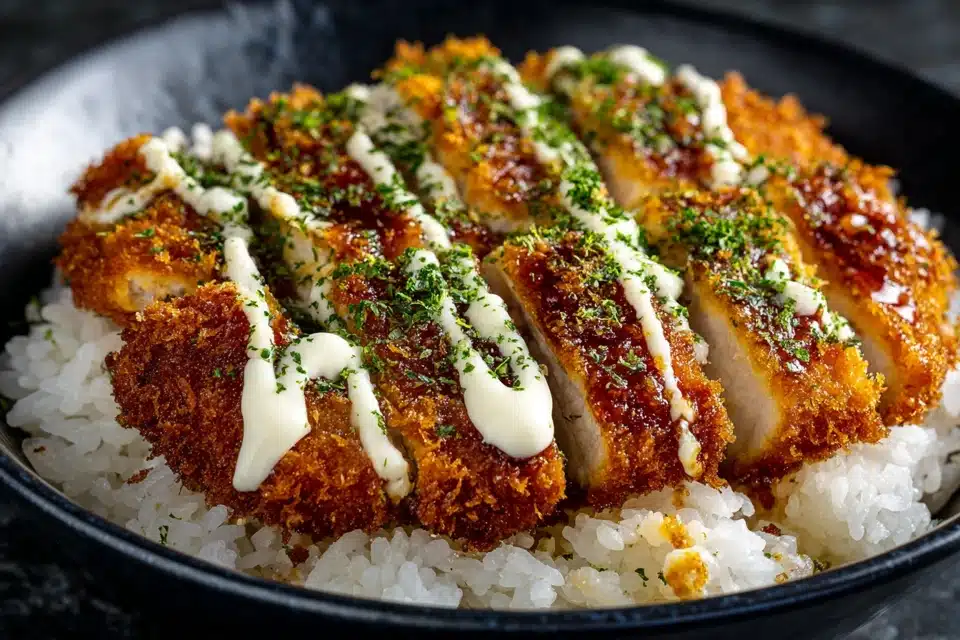
Crispy Japanese Katsu Bowls with Homemade Tonkatsu Sauce

Crispy Japanese Katsu Bowls feature golden pork or chicken cutlets served over rice with homemade tonkatsu sauce — a quick, satisfying meal ready in just 30 minutes.
- Prep Time: 10 minutes
- Cook Time: 20 minutes
- Total Time: 30 minutes
- Yield: 2–3 servings 1x
Ingredients
- 2 boneless pork chops or chicken breasts
- Salt and pepper
- 1/2 cup flour
- 2 eggs, beaten
- 1 cup panko breadcrumbs
- Neutral oil for frying
- 2 cups cooked short-grain rice
- Shredded cabbage, sesame seeds, scallions for garnish
Tonkatsu Sauce:
- 1/4 cup ketchup
- 2 tbsp Worcestershire sauce
- 1 tbsp soy sauce
- 1 tbsp sugar
- Optional: 1 tsp mirin or vinegar
- Optional: garlic powder or fresh ginger
Instructions
- Pound meat to 1/4-inch thick, season with salt and pepper.
- Dredge in flour, egg, then panko. Let sit 5–10 minutes.
- Heat oil in pan and fry cutlets 2–3 minutes per side until golden.
- Mix tonkatsu sauce ingredients and simmer or whisk until smooth.
- Slice cutlets and serve over rice. Drizzle with sauce and garnish.
Notes
Swap meat for tofu or veggies. Use gluten-free substitutes if needed. Sauce keeps for 1 week in the fridge.